

For this design you are going to need:

- clear coat (for the base and top coats)
- white polish
- red polish
- blue polish
- yellow polish
- green polish
- toothpicks (one for each color if possible) or a dotting tool
- a palette (paper plate, piece of paper, etc.)
The polishes I used were:
- Finger Paints "Paper Mache"
- Santee "Neon Sapphire"
- Wet n' Wild "Sage in the City"
- CQ "Rouge"
- Sally Hansen Insta-Dri "Lightening"

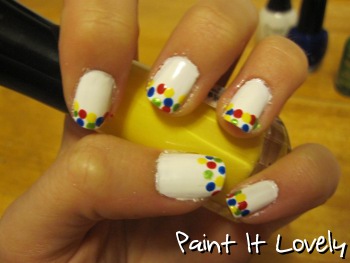
I decided to do only a couple dots at a time of each color - that way
the dots looked more random and layered. However, you could do all the
blue dots at once, then the red, and so on. Also, I only did the tips of my nails. It was cute, but feel free to get creative!
Use your scrap paper or paper plate as a palette for your nail polish. I would only put a little bit on of each color at a time. That way it doesn't dry out and a bunch of polish goes to waste. Like I said before, I alternated colors. The following pictures show how the look progressed. You can use any order of colors though.


No comments:
Post a Comment