This week one of my friends, Jessica (check out her
Etsy store!), posted this picture on my Facebook wall. I thought it was a really cute design and wanted to try it out myself.
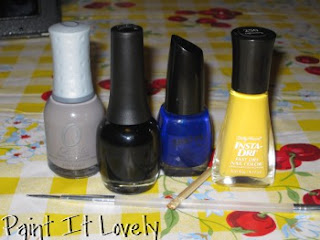
It's really simple and quick! Here's what you'll need:
- clear polish
- gray polish
- black polish
- blue polish
- yellow polish
- toothpicks or a dotting tool
- paper plate or scrap paper
If you've been following along with the blog, you know what to do first. Paint on that clear base coat.
Next paint on one or two coats, depending on your polish, of your gray polish. Orly's "Faint of Heart" took two coats to get it where you couldn't see any streaks.
 |
| Orly's "Faint of Heart" |
You'll be using your piece of paper or paper bowl as a palette. Put a dot or two of the black polish on your palette. Dip a toothpick into the polish and add a few dots, anywhere from four to seven, to the side of each nail. Make sure that they are all on the same side of your nails. Like this...
 |
| Finger Paints "Black Expressionism" |
Place some blue polish on your palette. Using a new toothpick, do the same thing with your blue polish, only dab on fewer dots. Layer the blue dots on over the black dots.
 |
| Santee "Neon Sapphire" |
Add some yellow polish to your palette. Use the smaller end of your toothpick to add a few yellow dots to each of your nails. The brighter the better. The yellow really pops against the darker colors.
 |
| Sally Hansen "Lightening" |
All that's left to do is paint on that clear top coat. I love how simple this design is and think it would look great with neon colors too. Have fun and try different color combos! Post your designs on the
Facebook page!


No comments:
Post a Comment